How to Read Python Variable in Javascript
Are you wondering how you can send data from JavaScript to Python? Well, that'due south piece of cake with an application programming interface (API).
Programming languages communicate and commutation data using APIs. Typically, in such advice, a backend technology (API provider) responds with data afterwards receiving a asking from a front-end script. There are many request types, though; in this article, you'll learn how to use the POST asking to transport JSON format data from JavaScript to the server using a Python API.
Python and Flask Server Installations
If you're on Windows and don't have Python installed already, download it from the python.org website. Mac users need not download Python as the Bone comes with information technology by default. Y'all'll be able to follow along reasonably well using Linux as well.
Server Setup and Installation
You'll need a server to create a Python REST API. In that location are many Python web frameworks for this. Flask, Django, FastAPI, Tornado, and many others come in handy for writing Rest APIs in Python.
Nonetheless, yous'll use Flask for this tutorial, as information technology's easy to empathize and API-friendly.
Beginning, create a Python virtual environment. Open your terminal to your project root folder. And so, install Flask and flask-cors using pip:
pip install Flask, flask-cors
The flask-cors parcel is Flask's built-in CORS module for bypassing the cross-origin resource policy while requesting from the API endpoint. You'll see how to set this upwards with Flask every bit you move on.
That'southward all for the installation part.
Flask Skeletal Structure
Side by side, create a new file in your project root folder. Ensure that it has the .py file extension. For example, it can be app.py.
Open up that file into your favorite lawmaking editor and set upwardly your Flask app every bit follows:
          from flask import Flask, request, jsonify
from flask_cors import CORS
            #Set up Flask:
app = Flask(__name__)
            #Gear up Flask to bypass CORS at the front end end:
cors = CORS(app)
            #Run the app:
if __name__ == "__main__":
            app.run()
The above code imports the required modules and configures your app. The actress code at the tail terminate (app.run()) sets the app to run on a default port, usually port 5000.
Create a POST API Endpoint
In this tutorial, you'll send JSON information containing unlike car brands and their models from JavaScript to the server using a Flask endpoint. In your JavaScript, you lot'll assign the data to a variable chosen cars. You lot can give information technology whatever name you like, though.
But first, open the app.py file, set up a POST API endpoint, and call information technology receiver. Have it in listen that you lot tin use whatsoever naming convention you like.
Here's how your Python file looks now:
          from flask import Flask, request, jsonify
from flask_cors import CORS
            #Set up Flask:
app = Flask(__name__)
            #Fix up Flask to bypass CORS:
cors = CORS(app)
            #Create the receiver API Postal service endpoint:
@app.road("/receiver", methods=["Mail"])
def postME():
            data = asking.get_json()
            data = jsonify(data)
            return data
if __name__ == "__main__":
            app.run(debug=Truthful)
Post Information From JavaScript to Python Flask API
Since the POST API endpoint is ready, create a JavaScript and HTML file in your project root folder (where your flask app is). Give them whatever proper noun y'all like (data.js and index.html in this instance).
Merely first, hither'south how index.html looks:
          <!DOCTYPE html>
<html>
            <caput>
            <title>
            Python sending
            </title>
            </caput>
            <body>
            <push id="theButton">Mail to Python</push>
            <h3 id = "info"></h3>
            <!-- Link to the JavaScript file here: -->
            <script src="data.js"></script>
            </body>
</html>
Notably, the HTML file above describes a button that listens to a click result to display the posted information, either in the console or the DOM.
The h3 tag serves every bit a container for the incoming data if yous afterward decide to brandish it in the DOM. Notation that this is not a convention—you can display the incoming data in any HTML container y'all similar.
Later setting upward the HTML file, employ the JavaScripts built-in Fetch API to postal service the data (cars) to the server.
Here's the JavaScript:
                      // Become the button and container elements from HTML:
const button = document.getElementById("theButton")
const data = document.getElementById("info")
            // Create an assortment of cars to send to the server:
const cars = [
            { "make":"Porsche", "model":"911S" },
            { "brand":"Mercedes-Benz", "model":"220SE" },
            { "brand":"Jaguar","model": "Marker Seven" }
];
            // Create an event listener on the button chemical element:
button.onclick= function(){
            // Get the reciever endpoint from Python using fetch:
            fetch("http://127.0.0.ane:5000/receiver",
            {
            method: 'Mail',
            headers: {
            'Content-type': 'awarding/json',
            'Accept': 'application/json'
            },
            // Strigify the payload into JSON:
            body:JSON.stringify(cars)}).then(res=>{
            if(res.ok){
            return res.json()
            }else{
            alert("something is incorrect")
            }
            }).then(jsonResponse=>{               // Log the response data in the console
              console.log(jsonResponse)
              }
              ).catch((err) => console.fault(err));                           }
The in a higher place script contains a JSON array of rally cars. The button.click function is a click event listener attached to the button in the HTML file you created earlier.
Hence, when a user clicks the button, fetch uses the Postal service request to send the array of cars to the server. The receiver endpoint in Flask receives this request and sends response data to JavaScript (front), which displays in the browser panel.
Now, launch the HTML file in your browser and open the developer console (on Windows: Ctrl + Shift + I, on Mac: CMD + ALT + I). Go to the Console section, and you'll run across the returned JSON response.
To rail the JSON response in existent-fourth dimension, click Network in the developer panel (on Chrome). Below the network timeline, select receiver or the proper noun of your Flask endpoint. Then click Response at the acme of that submenu.
The response should look something similar this:
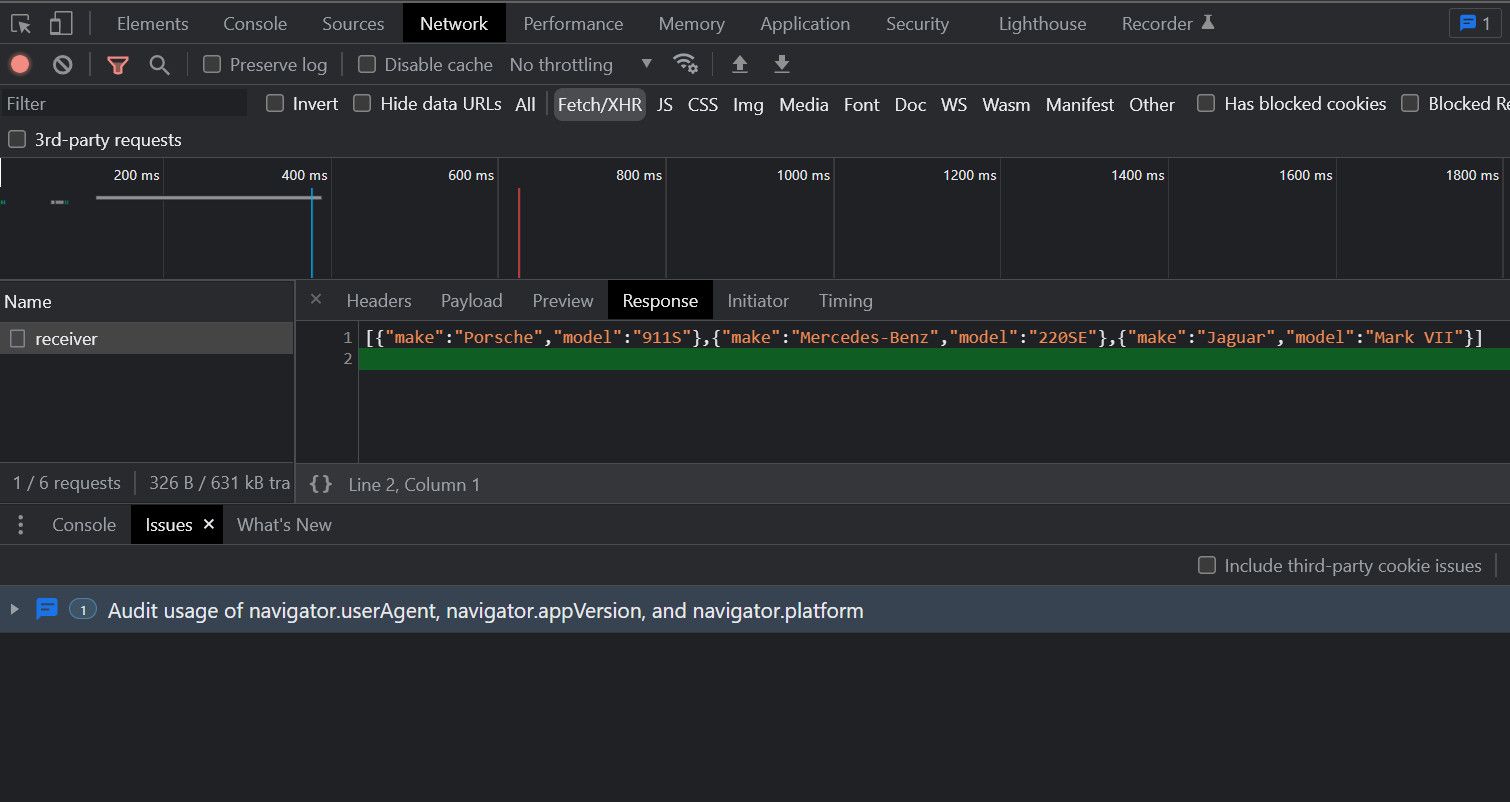
Besides, you lot can click Headers to view the response status of the request. This should exist 200, which means your API has returned a valid response.
Next, you can now write the data to the DOM with boosted logic in your JavaScript:
                      // Become the button and container from HTML:
const push = document.getElementById("theButton")
const data = document.getElementById("info")
            // Create an outcome listener on the push button element:
button.onclick= role(){               // Get the receiver endpoint from Python using fetch:
              fetch("http://127.0.0.1:5000/receiver",
              {
              method: 'POST',
              headers: {
              'Content-type': 'application/json',
              'Accept': 'awarding/json'
              },
              // Strigify the payload into JSON:
              trunk:JSON.stringify(cars)}).then(res=>{
              if(res.ok){
              render res.json()
              }else{
              alert("something is wrong")
              }
              }).so(jsonResponse=>{                                        // Iterate through the data with Map and write your rendering logic:
              jsonResponse.map(Main=>
              Main.make==="Porsche"? data.innerHTML +="<p>"+ Master.make+" "+" is a practiced product":
              data.innerHTML +="<p>"+ Main.make+" "+"is an average product" )
}
).catch((err) => console.error(err)); }
Using the map function, the above script loops through the response data. The Principal.make attribute gets the proper name of each car from the response data returned from the server. The ternary logic within the map function then instructs JavaScript on what to display with each brand.
Hence, when you click the post button, hither's what you lot get:
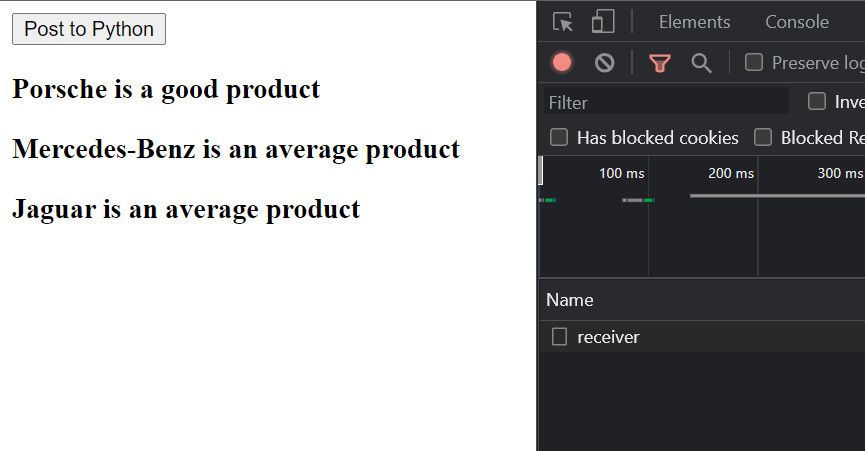
At that place yous become! You lot now know how to prepare a Flask endpoint and post information to the server asynchronously using JavaScript.
Keep Exploring Remainder APIs in Web Evolution
APIs offering the best fashion to separate your backend from the front. Ane of its advantages is information technology lets you decouple the client-side from the server-side hands. You've seen how to connect JavaScript to Python and send information to the server, but that's only a scratch of the surface.
You tin can dig deeper past connecting the Flask REST API to a database like MongoDB—so this lets you have a repository to shop the posted data. You might fifty-fifty plow this into a full-blown project past sending the data to the database using a form field.
Nigh The Author 
hazelwoodexambeir1955.blogspot.com
Source: https://www.makeuseof.com/tag/python-javascript-communicate-json/
0 Response to "How to Read Python Variable in Javascript"
Post a Comment